Installing Poly Hardware for Bird Netting
One of the keys to a successful bird netting installation is how well the netting is fastened. The following guidelines will help you install the Poly Hardware correctly.
NOTE: Each netting installation is different and some of the guidelines may not apply to your application. If you have questions or need help, please
Contact Nixalite.
We provide detailed instructions for Installing Poly Hardware -
Poly Hardware Installation Instructions
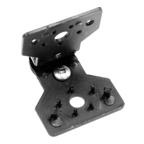
Mounting Hardware: Each Poly Clip has 2 mounting holes (5/16" and 3/16" diameter). Make sure the hardware you use will fit through these mounting holes. You can purchase and use Nixalite's stainless steel mounting hardware, or you can furnish your own.
DO NOT USE ADHESIVE TO INSTALL POLY CLIPS !
THREE Methods Of Installation:
 |
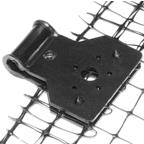
Install PolyClips on the surface before the netting
-
Always fasten the side with teeth to the surface.
-
Install every 12" on flat surfaces, every 6" on curved surfaces.
-
Snap the Poly Clip shut over the rolled edge of the netting.
|
 |
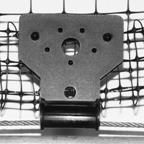
Install PolyClips on the netting. then to the surface: not recommended for curved or complex surfaces.
-
Snap a Poly Clip shut every 12" along the rolled edge of the netting.
-
Fasten the Poly Clip (with the netting inside) to the installation surface.
|
 |
Installing PolyClips along a perimeter cable: some netting installations use a tensioned cable for support.
-
With the Poly Clip open, position the cable inside the hinge at the back of the clip.
-
Snap the Poly Clip shut over the cable and netting every 12".
|
Net Tie Installation Guidelines: Use for quick and easy overhead support and seam fastening.
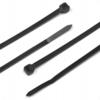 |
For Overhead Support
-
Every 12", pass the tie through the netting, around the overhead support and back through the netting.
-
Pass the tail of the tie through the lock, pull tight and trim excess.
Seam Fastening
-
Every 6", loop the tie around both pieces of overlapped netting, enclosing strands from both nets.
-
Pass the tail of the tie through the lock, pull tight and trim excess.
|
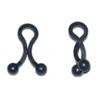
Twist Lock Installation Guidelines: Use to join two pieces of netting together, seal cuts in the netting, install access panels, etc.
 |
Seam Fastening
-
Every 6", push an open Twist Lock through the netting mesh, enclosing strands from both nets.
-
Twist to close the Twist Lock.
Seal Cuts, Install Access Panels, Etc
-
Every 3", push an open Twist Lock over strands from both sides of the cut in the netting.
-
Twist to close the Twist Lock over both sides of the netting.
|
Poly Cord Installation Guidelines: Use to sew up seams and reinforce overhead support by tying the net to objects above. DO NOT USE FOR PERIMETER SUPPORT.
 |
Sewing Seams
-
Tie the Poly Cord to the installation surface at one end of the seam.
-
Weave the Poly Cord through both pieces of overlapped netting every 6 to 12”.
-
At the end of the seam, tie the Poly Cord to the installation surface to anchor it in place.
For Overhead Support
-
Before the netting is installed, tie the Poly Cord to objects above the level of the installed netting. Leave PolyCord extra long.
-
Install the bird netting and pull cord through netting and tie to the netting mesh.
|
Let Nixalite help you plan your netting installation!
There are many different ways to effectively install bird netting. Much of the netting hardware we offer can be mixed and matched to create a fastening system tailored just for your application. If you have any questions about your netting installation or the selection of your netting hardware, please
Contact Nixalite.