Installing Premium Nixalite® Bird Control
The following provides basic procedures and guidelines for installing all Premium Nixalite models on a variety of architectural surfaces. In most cases, the page and information is presented in the same order as needed for a typical Premium Nixalite installation.
IMPORTANT: Click the link if you will be installing the Nixalite as a
Climbing Animal Barrier. Climbing Animal Barrier installations follow a different set of instructions and guidelines.
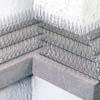 |
Premium Nixalite Spacing
Premium Nixalite is a physical barrier - it protects only the space it occupies.
Proper spacing between the Premium Nixalite rows is critical. |
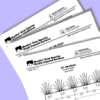 |
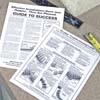
Estimate Worksheet
With just a few clicks this worksheet will recommend the Premium Nixalite model,
provide a total per surface and produce a drawing for that surface. |
 |
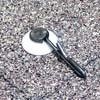
Surface Cleaning
Successful bird control starts with a thorough cleaning of the installation surfaces.
All installation surfaces must be clean, dry and free of debris before installing. |
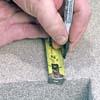 |
Surface Layout
Once the Spacing and Estimate Worksheet information has been gathered (above),
Mark the strip and hardware locations on the surface. |
 |
Standard Hardware Installation
Step-by-step instructions for installing Nixalite's standard mounting hardware.
Exclusive to Nixalite, standard hardware allows for strip removal and reinstallation. |
 |
Adhesive Fastening
Nixalite recommends using the standard mounting to fasten all types of bird spikes.
If standard hardware cannot be used, then adhesive fastening can be done. |
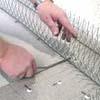 |
Installing Premium Nixalite Strips
To get the best from the best, you need to install it correctly. The last step of a
Premium Nixalite installation is to cut, fit and install the Premium Nixalite strips. |
 |
Troubleshooting
The effectiveness of a Premium Nixalite installation depends on how proficiently
it is installed. Use this information to find any problems. |
If you have an unusual application or a surface that is not covered in this information, w
e offer complete planning and product support services. If at any time you have questions, please Contact Nixalite.