Installing Bird Netting
The following information offers basic procedures for the installation of the bird netting. It is not all inclusive, instead it covers the steps that most netting installation require. There are many different ways to effectively install bird netting, but the goal should always be the same; no gaps, openings, wrinkles or excessive sag in the finished netting installation.
NOTE: Each netting installation is different and some of the guidelines may not apply to your application. If you have questions or need help, please
Contact Nixalite.
 |
Checkpoint! Before continuing, you must know... |
-
The type of bird netting you will be installing. If you are not sure, review the Net Planning Guide for recommendations or go to the K-Net, B-Net or PollyNet pages.
-
What kind of netting hardware you will be using. If not, review the Net Planning Guide or the Netting Hardware pages.
-
If installing the netting with a tensioned cable system, the cables should be installed and ready to receive the netting. If not, review the Install Cable Hardware page.
-
If installing the netting with Poly Hardware, you must know how each piece of hardware is installed. Review the steps outlined on the Install Poly Hardware page first.
Cutting the netting;
PollyNet, K-Net and
B-Net bird netting can be cut to the desired size and shape with a
good pair of scissors- no special cutting tools are needed. Nixalite offers the ST Scissors which are EMT shears. They are multipurpose and can be purchased with the
Bird Netting Tools and Accessories.
Before you cut, double check your dimensions. Make sure that you have allowed extra netting for perimeter fastening and overlap seams (6" min. for both). Always leave the piece of netting bigger than what you will actually need.
Joining Nets Together at Overlap Seams
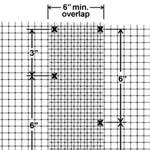 |
For PollyNet: Overlap the netting pieces a minimum of 6". Install the poly hardware seam fasteners every 6" on both sides of the seam for its full length. Twist Locks, Net Ties or Poly Cord are recommended for sealing PollyNet seams. DO NOT use metal net rings to seal PollyNet seams. |
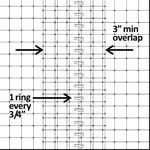 |
K-Net HT: An overlap seam (also called a ‘freestanding’ seam) is where you need to join two pieces of K-Net bird netting together without the benefit of a support cable or part of the structure.
1. Overlap the edges of the two pieces of K-Net by at least 3 mesh (2.25 in./5.7cm).
2. Joining K-Net together at a seam is done with 'net rings'. Choose the rings and ring tool* that best suits your application.
3. Join the two pieces of netting by installing one net ring in EACH overlapped 3/4" square mesh along the full length of the seam.
* Nixalite offers 3 types of net rings and ring tools. |
Perimeter Fastening
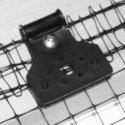 |
For PollyNet: Roll the edges of the netting 2 or 3 times when installing PollyNet with PolyClips.
|
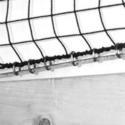 |
For K-Net & B-Net: Use Net Rings to fasten the K-Net to the perimeter cables. PolyClips can be used with the cables if desired. |
Interior Support
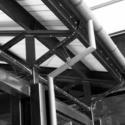 |
Overhead Supports: Locate and utilize overhead pipes, beams, trusses, etc to help support the interior netting areas (away from the perimeter). Fasten to the overhead support items as often as possible. We recommend using the Net Ties, Poly Cord or the Net Savers for support hardware. |
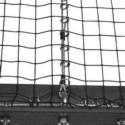 |
Support Cables: Used when there is minimal overhead support. Bird netting should NOT be allowed to run more than 50 feet without support cables. We recommend installing support cables every 25 feet. For K-Net use Net Rings to fasten the netting to the cable. For PollyNet, use the Net Ties. |
Fitting Around Obstructions
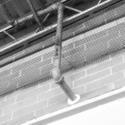 |
Objects hang lower than the installed netting: DO NOT cut large pieces out of the netting. To fit the netting around objects (such as lights), make simple slits or X cuts just big enough to fit the object. If the obstruction is close to an outside edge, make a straight cut from the edge to the obstruction. If it's in the middle of the installation area, cut a slit or X in the net below the object. Pass the object through the mesh and seal the netting back together above/behind it. Use seam hardware to seal up the slit or cuts around the object. |
 |
Fit netting around objects:
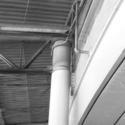
Square/Rectangular objects along the perimeter (a column). Cut a simple "T" in the net that is the same width and depth as the column (see drawing). Use the excess netting of the "T" to fasten to the perimeter hardware (perimeter hardware must follow the shape and direction of the outside edges).
Round objects along or close to the perimeter (large pipe). Cut an "X" big enough to fit the diameter, then make a slit from the "X" to the closest edge of the netting. Use the excess netting of the "X" to fasten to the perimeter hardware (perimeter hardware must follow the shape and direction of the outside edges). |
Additional Installation Methods
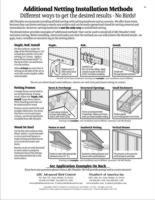 |
Common construction materials can be used to install bird netting. This type of installation is constructed and customized to fit on-site. For a detailed page on these alternate methods of installation, load the Additional Netting Installation Methods page. There are many different ways to install bird netting but the goals of the installation should always be the same: no gaps, openings, wrinkles or excessive net sag. For more information on other installation methods Contact Nixalite. |
Let Nixalite of America Inc help you plan your netting installation!
If you provide detailed information about your bird netting application, Nixalite will recommend a netting system and provide a material quotation. It is critical that your information is accurate and complete.